In App Review · 7,99 € once, everything included
 AirMouse
The computer is across the room and the trackpad is not. Your phone becomes one, along with the keyboard you are missing.
From nothing to controlling it
- 01
Install it on the computer
One file, from this page. On a Mac you drag it into Applications; on Windows and Linux you run what you downloaded. It keeps out of the way: it opens its pairing page in your browser once, and after that has no window and no icon.
- 02
Open AirMouse on the phone
The computer appears in the list by itself. Nothing to type, no address to hunt for, no account to make.
- 03
Click Allow, on the computer
A box asks whether to trust the phone. That is the whole of pairing. A code exists for a computer nobody is sitting at, and most people never see it.
- 04
It never asks again
Open the app and it is already connected. If the computer changes address, the phone finds it and remembers the new one.
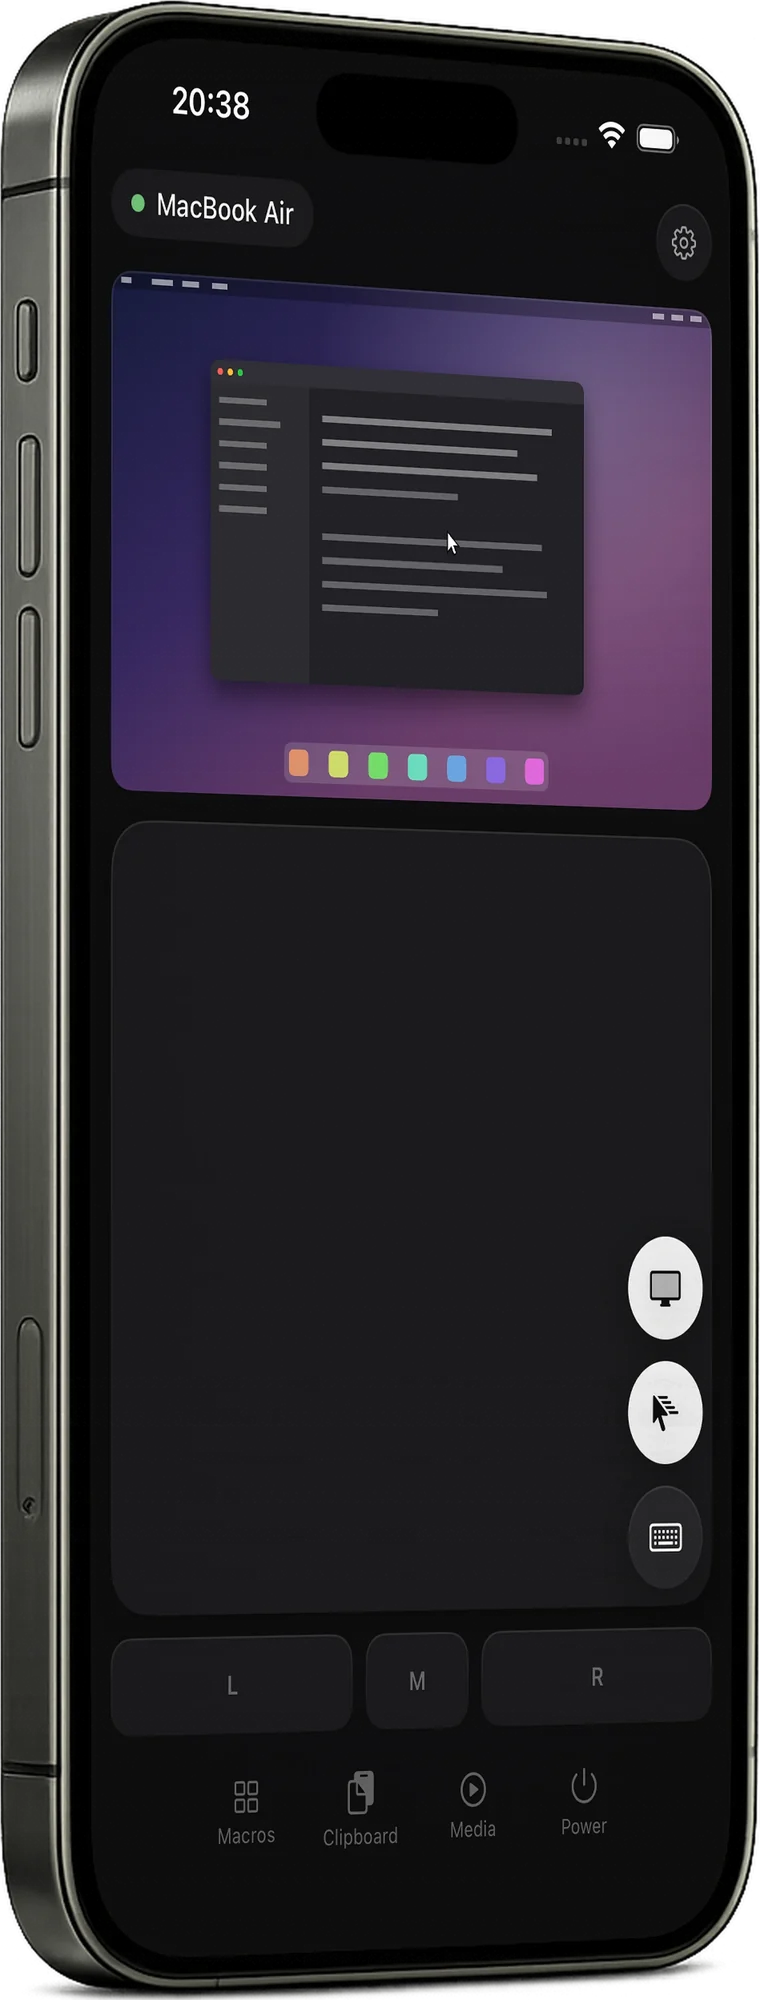
What it is
Not a remote with six buttons on it. The things you do with a computer all day, on the surface already in your hand.
- A real trackpad
Tap, right-click, two-finger scroll, drag. Three fingers switch desktop or app, pinch zooms. The gestures your computer's own trackpad has, mapped to what that machine does with them.
- The keys a phone lacks
Ctrl, Alt, the arrows, F1 to F12, Ctrl+Alt+Del. Type live or write first and send it whole.
- A macro pad
Buttons that run shortcuts, type text and open things. Group them, and the pad follows whichever app is in front: the editing grid for the editor, the meeting grid for the call.
- One clipboard, two devices
Text and pictures either way. What a password manager marks as private stays on the computer and never crosses.
Everything it does
Open one to read it. Every picture is the app itself.
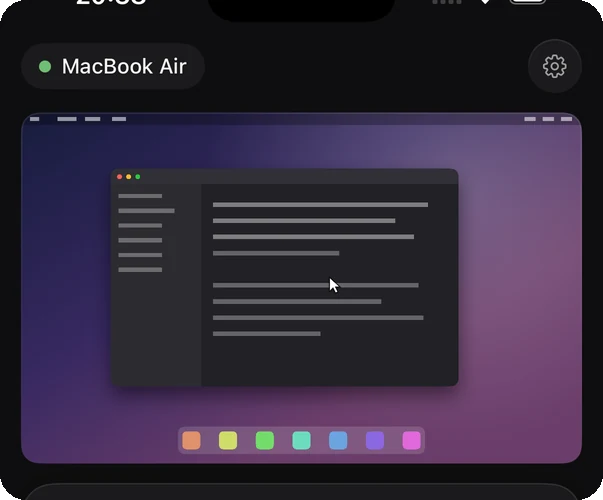
01 The computer's screen, live
Turn it on and the display appears above the pad: the cursor you are moving, the menu you just opened, the dialog that wants an answer. It is a monitor, not a control surface: the gestures stay on the pad below, where your muscle memory already is.
The live screen works with a Mac or a Linux desktop on X11, and everything else on this page works with Windows too. It is all included in the app, with nothing to buy inside it. Sent as JPEG tiles at the width you ask for. Still screens cost nothing: a tile that has not changed is not sent, and the pointer travels on its own tiny channel.
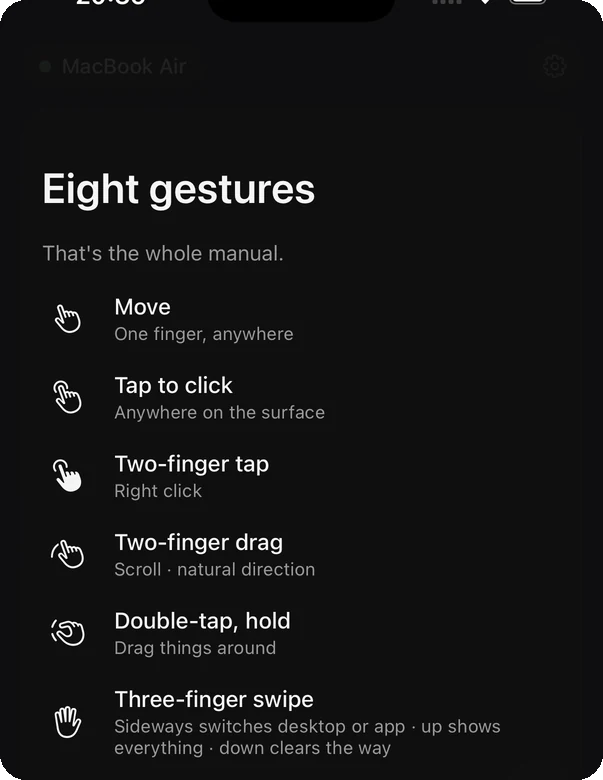
02 Eight gestures, and that is the manual
One finger moves the cursor, a tap clicks, two fingers scroll and right-click, three switch desktop, pinch zooms. Double-tap and hold to drag anything: text, a file, the corner of a window.
Each one does what that machine's own trackpad does with it: desktops on a Mac, workspaces on Linux, apps on Windows. The phone asks the computer what it is before it decides what a swipe means.
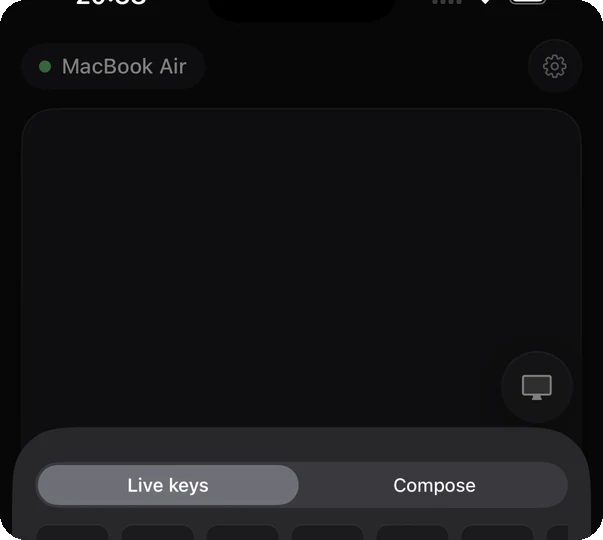
03 The keys a phone does not have
Ctrl, Alt, the arrows, F1 to F12, Escape, Tab, and Ctrl+Alt+Del where that means something. Tap a modifier to arm it and it applies to the next key you press, then lets go by itself.
Type live and every keystroke lands as you make it, or compose the whole thing first and send it in one go. Which modifiers you see depends on the computer: ⌘ ⌥ ⌃ ⇧ on a Mac, Ctrl Alt Shift and Win or Super elsewhere.
04 Buttons that do several things
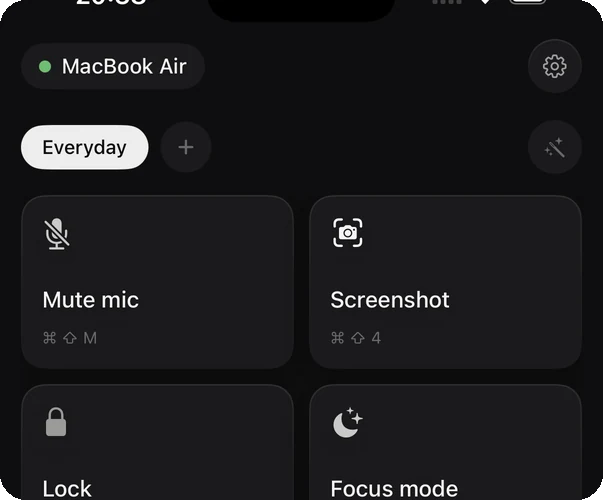
A macro is one tile that runs steps in order: a shortcut, some typed text, opening an app or a link, a media key, a pause. Mute the microphone. Lock the computer. Set the volume, wait, and press play.
The editor runs them while you watch, highlighting each step as the computer performs it and naming the one that fails.
05 A pad that follows your work
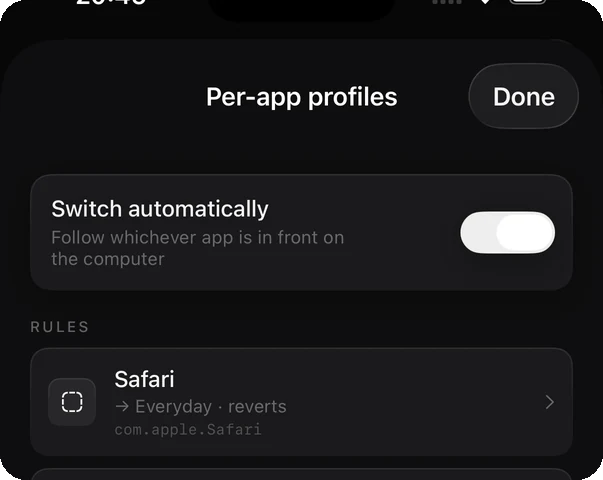
Group macros into profiles and bind each to an app on the computer: one grid for writing, one for calls, one for the editor. The grid changes when you change what you are doing, and says which app moved it.
Rules are stored against the app's identifier rather than its name, so they survive changing the computer's language.
06 One clipboard, two devices
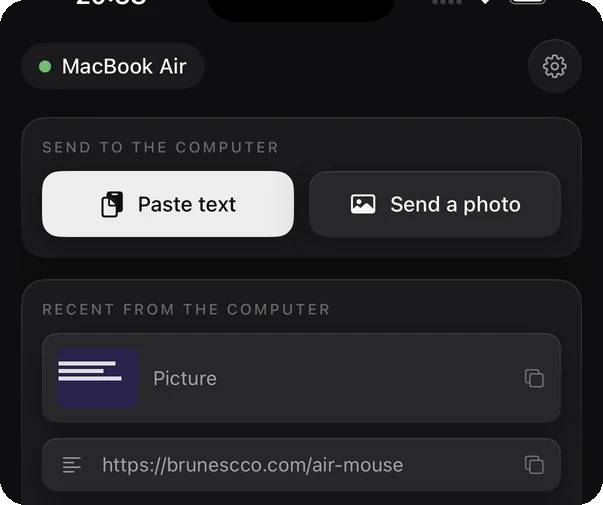
Whatever is on the phone goes to the computer in one tap, photos included. Whatever the computer copies appears here: text as text, pictures as pictures, which is what makes copying a screenshot worth doing at all.
What a password manager marks as private never crosses: the computer withholds it before it reaches the network, and says so.
07 Play, pause and volume from across the room
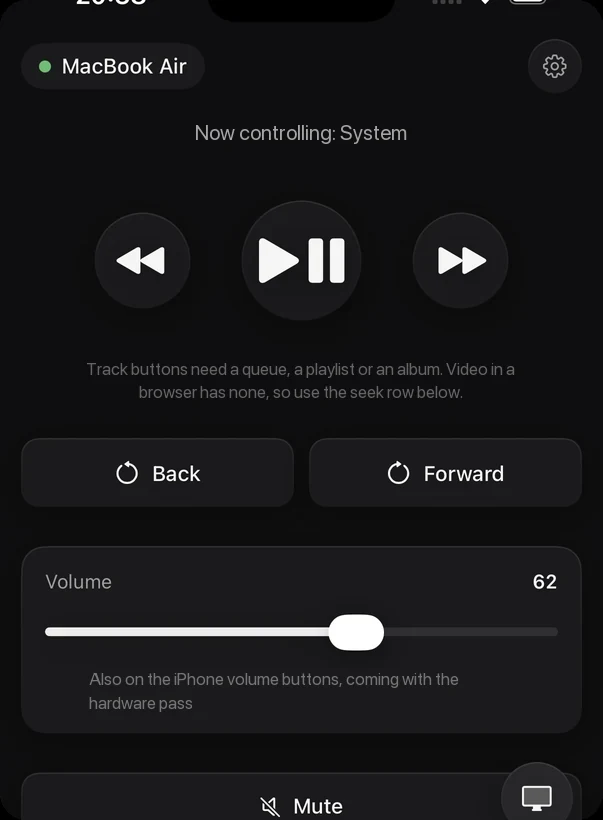
The computer's own media keys, so they reach any player, including video in a browser, which ignores everything else. A volume slider that reads the computer's real level, and a seek row for video, which has no queue to skip through.
On Linux it talks to the player directly over MPRIS, needing no keyboard permission at all.
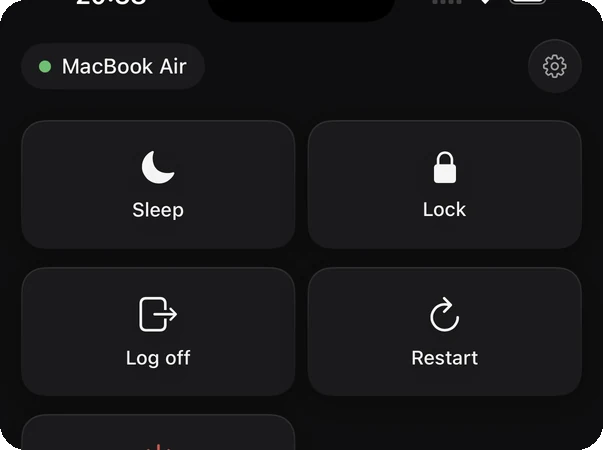
08 Sleep, lock, and wake it again
Sleep, lock, log off, restart, shut down, each behind the computer's own confirmation, which is the right place for that question to be asked.
A computer that is already asleep can be woken over the network, and the app tells you whether the packet actually went anywhere rather than claiming success.
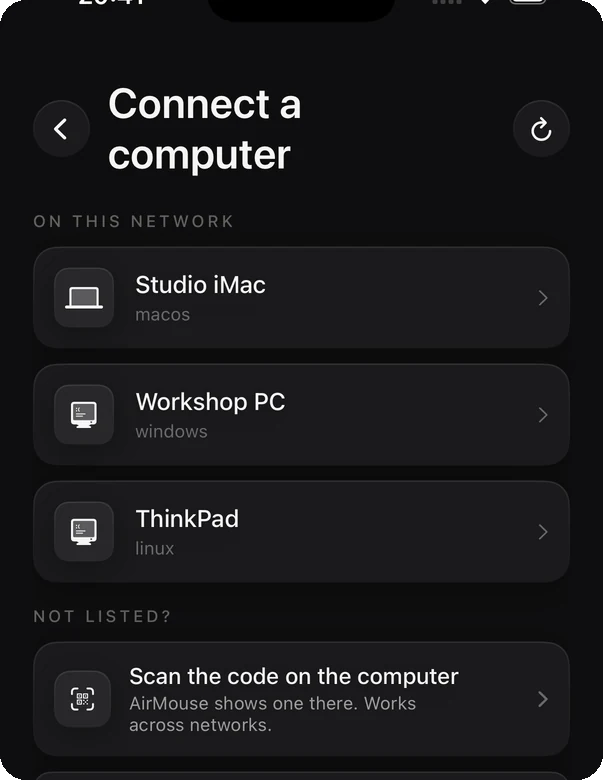
09 It finds the computer by itself
Open the app and the computer is in the list. Click Allow on it, once, and the phone never asks again. It reconnects on its own, and finds the computer again if its address changes.
For a machine on another network, or one with nobody sitting at it, there is a code to scan and an address to type. The server is one file, downloaded from this page.
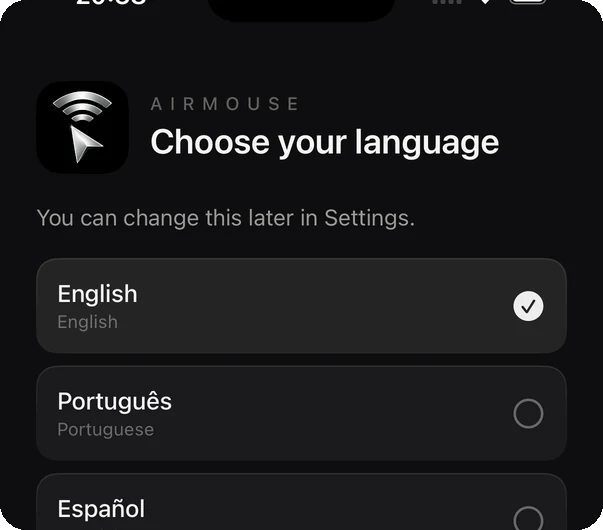
10 English, Portuguese and Spanish
It opens in whatever language your phone is set to, and asks once which of the three you want. Change it later in Settings and the screen changes under your finger. No restart, nothing to confirm.
What it refuses to do
It works on your network and nowhere else. Nothing reaches a server on the internet, there is no account to make, and the pairing is a token the two devices hold, not a login. Shell commands from a macro are refused unless the computer is explicitly started to allow them, because a paired phone should not be able to run anything it likes.
Something has to run on the computer for a phone to move its cursor; every app of this kind works that way, and none of them can avoid it. What can be avoided is making you do work for it, so the installing, the starting and the pairing are one file, one click and one Allow.
Get AirMouse for your computer
The desktop side is free · Windows 10 and 11 · macOS 13 and later · Linux, X11 or Wayland
On a Mac it is signed and notarised by Apple, so unzip it, drag it to Applications and open it like anything else. The first time it runs, macOS asks for Accessibility in System Settings → Privacy & Security: without it the cursor cannot move. It asks once. The live picture of the screen needs one more, Screen Recording, in the same place: turn it on and AirMouse Server picks it up by itself. Everything else works without it.
Point your phone here
This opens the page on the phone, where the app is. Scan it while you wait for the download to finish.
The code that pairs the two is a different one. It appears on the computer after you install, never on a web page. It is only good for your machine, and putting it here would hand it to everyone who visits.